Fix a Hole In ceiling
As a licensed drywall repair contractor serving Conshohocken, PA and surrounding counties, we often get calls from homeowners that need to fix a hole in their ceiling after water damage or accidents. No one wants to find a hole in their ceiling, but it happens.
It’s important to deal with the issue promptly and properly; otherwise, you could be facing more serious water damage repairs down the line. Here’s what to do—and when to call a professional.
In this article, we’ll discuss how to handle a hole in your ceiling and what steps you need to take. We’ll also provide tips on preventing future holes from forming. Read on to learn all about dealing with a hole in your ceiling!
Need Ceiling Hole Fixed Fast?
Patch and Paint Pros offers expert ceiling repair services in Conshohocken and the surrounding Montgomery, Chester and Delaware County areas. Whether it’s from water damage or impact, we’ll make it look like it never happened.
Call or Text to Learn More
Assessing The Damage
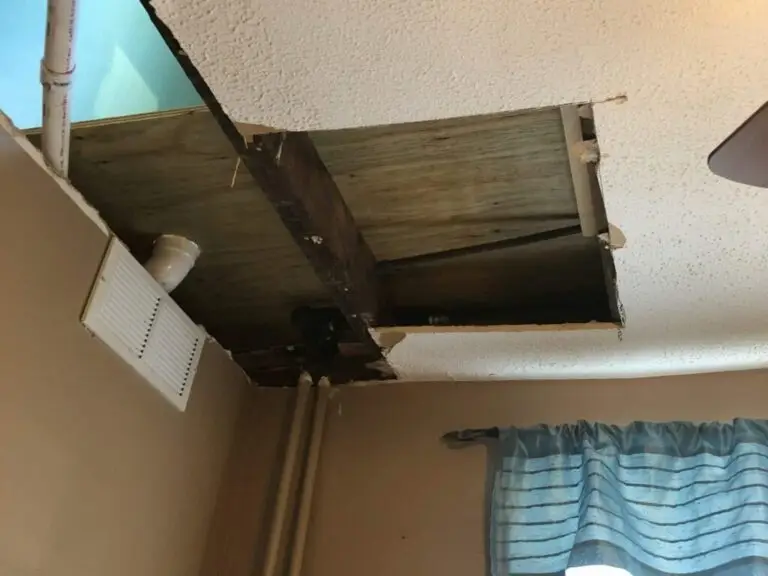
If you suspect a roof leak, start by checking the attic for signs of water damage or mold growth. Or if damage is on lower levels of the house, there may be a plumbing issue. Learn more about who to call for water damage repairs.
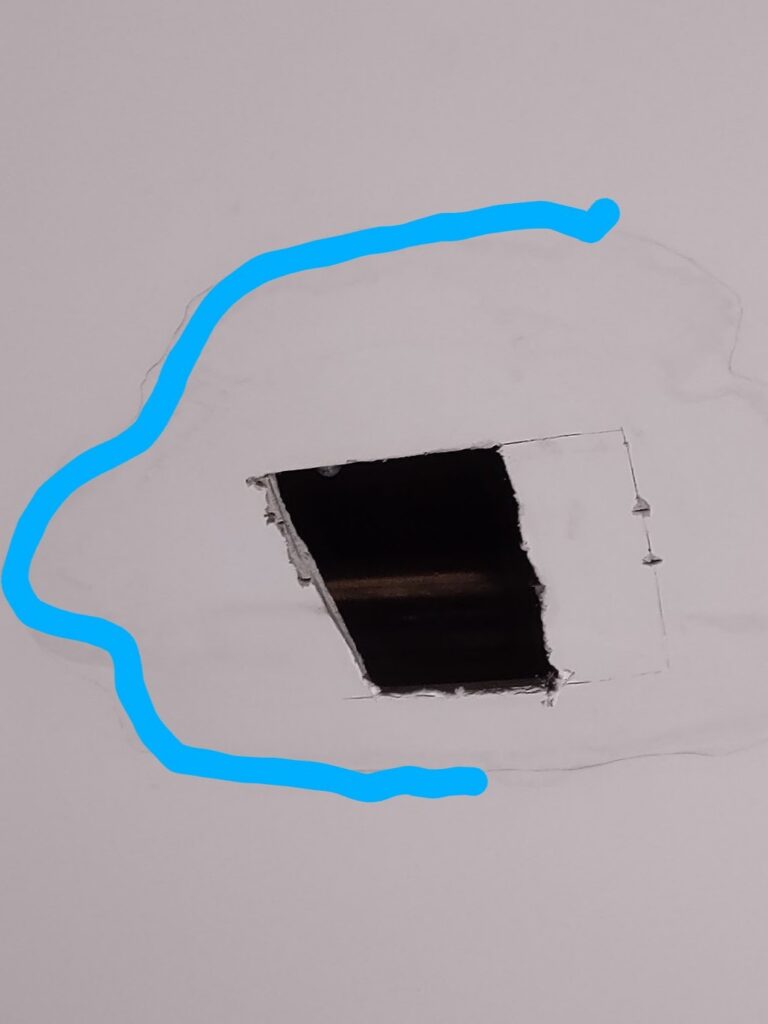
If there are no signs of leaks, the problem may be due to a drywall screw that has popped out or larger holes in the ceiling caused by something hitting the ceiling.
Once you have determined the source of the problem, it’s time to start fixing the damage. If it’s a small hole, you may be able to patch it with some spackle or joint compound. For larger holes, you’ll need to cut out the damaged area and replace it with a new piece of drywall. Be sure to attach the new piece to the ceiling joists for stability.
Ceiling damage can be frustrating, but with the right tools and techniques, you can repair it quickly and easily. Just remember to take your time and always prioritize safety when working on a ladder or lift.
Determine the Materials to Fix the Hole
Repairing a hole in the ceiling can seem daunting, but with the right approach, it’s a manageable DIY project. The first step is to assess the type of ceiling material you’re dealing with, as this will dictate the repair method.
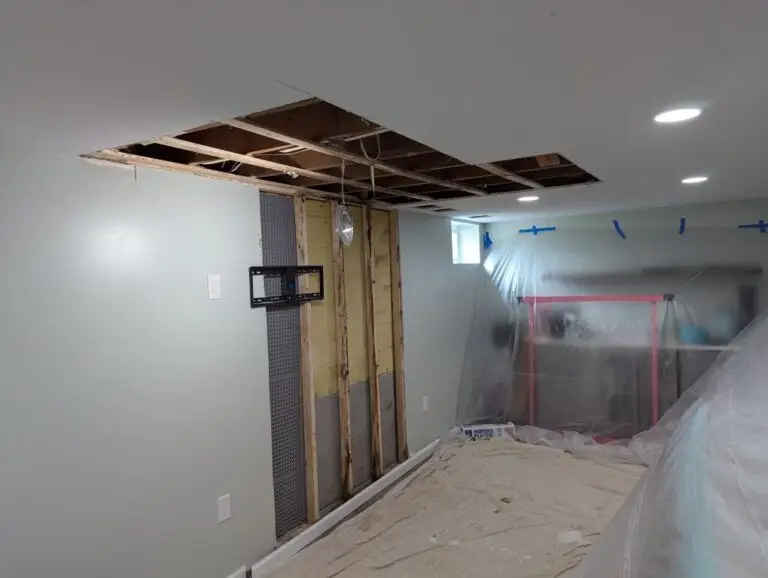
For drywall ceilings, you can start by cutting out the damaged area with a drywall saw or utility knife, being sure to cut out a clean square or rectangle shape. Then, measure and cut a new piece of drywall to fit the hole, securing it to the ceiling joists with drywall screws.
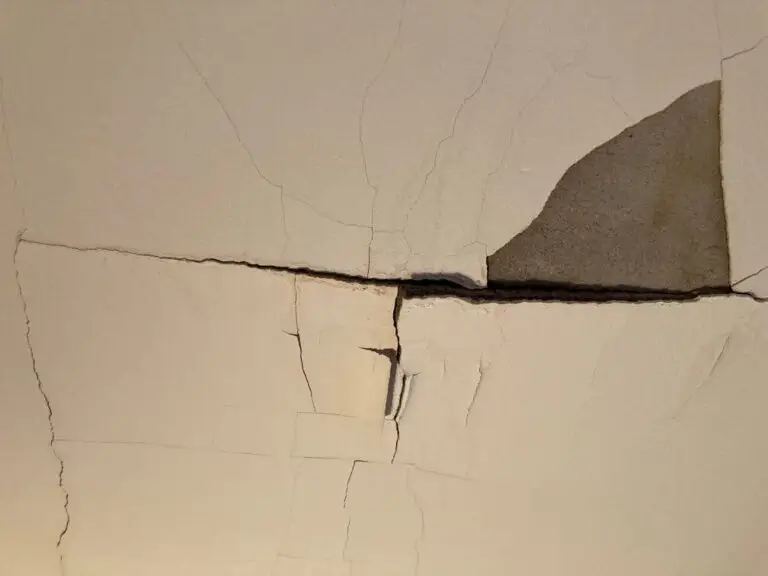
For plaster ceilings, larger holes may require a bit more effort. You’ll need to remove any loose plaster around the hole, then apply a layer of mesh tape before covering it with a joint compound. Once the compound has dried, sand it down to create a smooth surface and finish with a layer of paint to match the surrounding ceiling color.
Regardless of the ceiling material, it’s important to address any underlying issues that may have caused the hole, such as a leaky roof or damaged electrical wiring. Taking these extra steps will ensure that your ceiling repair is a long-lasting solution. If you need help on your drywall or plaster repair project, reach out to Patch and Paint Pros in Conshohocken, PA.
Repairing The Hole
The ceiling had a gaping hole, the kind that made you fear for your safety. The problem must be addressed – but how? The repair process seemed daunting and it was intimidating to even start. But something had to be done, so I decided to take on this challenge head-on.
I got to work gathering my supplies: drywall, screws, joint compound, sandpaper…and more. After carefully studying the instructions and making sure I knew exactly what I needed to do, I began fixing the hole in earnest.
It took time and patience – especially when getting the right levels of pressure while screwing into place – yet eventually, I succeeded in restoring the integrity of the roof. Now all that was left was determining if further preventative measures were necessary.
Making Preventative Improvements
Once you have identified the hole in your ceiling, it’s important to make preventative improvements. You should check for any other potential weaknesses or signs of damage that could be causing or contributing to the hole. For example, if there is water damage, look around and see if there are any stains or discoloration on the walls and nearby woodwork.
Additionally, inspect adjacent electrical wiring and plumbing fixtures that may be associated with the area. If possible, take steps to reduce moisture levels in the affected space by using fans or dehumidifiers. This will help ensure a dry environment so your repairs last longer and minimize further damage from occurring.
Improving ventilation can also help reduce humidity levels which might otherwise cause condensation buildup inside walls and ceilings.
In addition, properly sealing cracks between wall panels and windowsill areas can also protect against future issues like mold growth. After taking these measures, you’ll be ready to move on to consulting a professional about repairing the damaged ceiling.
How to Fix a Hole in the Ceiling:
Start with Prevention
Before you jump into a ceiling repair, it’s critical to address the root cause. At Patch and Paint Pros, we know that a lasting repair starts with thorough preparation. To properly fix a hole in your ceiling and ensure it doesn’t return, follow these preventative steps:
Inspect for Hidden Damage: Don’t just look at the hole. Check the surrounding area for stains, sagging, or peeling paint—these are clear signs of water damage.
Check Nearby Fixtures: Inspect any adjacent electrical wiring or plumbing. If a leaky pipe caused the damage, that must be repaired first to prevent mold growth and future drywall failure.
Manage Moisture Levels: If the area feels damp, use fans or a dehumidifier to dry out the space completely. Moisture is the enemy of a clean finish; ensuring a dry environment is the only way to make your ceiling repair last.
Improve Ventilation: High humidity often leads to condensation inside walls and ceilings. Ensure your space is well-ventilated to protect your home from long-term structural issues.
Seal the Gaps: Properly sealing cracks around wall panels or windowsills helps prevent future moisture intrusion and mold.
Once the area is dry and the source of the damage is resolved, you’re ready for a professional drywall repair. If the job looks bigger than a DIY fix, our crew of experienced painters is here to help get your ceiling back to flawless condition.
Need Ceiling Hole Fixed Fast?
Patch and Paint Pros offers expert ceiling drywall repair in Conshohocken and the surrounding Montgomery County area. Whether it’s from water damage or impact, we’ll make it look like it never happened.
Final Thoughts
The repair process for a hole in the ceiling can be daunting, but it is important to follow each step. By assessing the damage, locating the source, and repairing the hole, you’ll be able to return your ceiling to its former state.
And if needed, consulting with a professional ensures that everything is done correctly. What’s even more interesting is that according to recent statistics, up to 50% of homes have some kind of water-related damage due to leaks or flooding.
This shows just how important it is for homeowners to take steps towards preventing such issues from occurring and taking action when they do arise. With proper attention and effort on our part, we can make sure our ceilings are safe and sound.


